Guides
Graphic apparel quality guide: appearance, placement, cure, adhesion, stretch, laundering, and care
Graphic apparel quality guide covers appearance, placement, cure, adhesion, stretch, laundering and care, then tests the whole decorated garment before shipping.
What to take away
- Write the acceptance limits before the first screen is burned: datum point, tolerance in millimeters, color reference, hand reference, care cycles, pass criteria.
- A print that looks right warm can split, lift or bleed after cooling, stretching or laundering, so judge it cold and after the care route.
- Cure is proven by the ink maker's test, not by the dryer's display. A conveyor reading of 320 F says nothing about the deposit.
- Keep one durability check per failure mode. Stretch finds splits, crocking finds transfer, laundering finds everything at once.
- Hold the approved first-off, the raw readings and the rejected pieces until the deviation is closed out.
Quality is fitness for a stated purpose. The purpose covers the graphic, the blank, the decoration system and the placement. It also covers the feel, the care route and how the garment will actually be worn.
Write the limits before the run
Put the requirement in numbers a press operator can check. Record these details: blank style, color, size range, and fiber content. Also record dye lot, decoration method, artwork revision, and placement datum. Record tolerance, color reference, hand reference, and care cycles. Record the name of whoever signs off.
One Placement Rule vs Size Range
Medium
- Collar drop
- Reads well
- Shoulder width
- Narrower
- Chest width
- Baseline
- Action
- Measure smallest
3XL
- Collar drop
- Sits low
- Shoulder width
- Widens faster
- Chest width
- Widens slower
- Action
- Measure largest
Words like centered, bright, soft and durable are not limits. Centered means a stated distance from a stated seam, plus or minus a stated number of millimeters. Soft means a named reference garment the shop keeps in a bag.
One placement rule rarely fits a full size range. A fixed drop from the collar seam that reads well on a medium can sit low on a 3XL, because the blank's shoulders widen faster than the chest. Measure the smallest and largest sizes in the range before you write one rule for all of them.
Choose blanks and build first-offs
Pull test garments from the production supplier, style, color and dye lot. Keep one undecorated control sealed and labeled. Here is the one-sentence lead-in and the listed items:
- Run coded first-offs through the real artwork, mesh, emulsion, ink, squeegee, flash settings, press time, pressure and peel temperature.
Let each piece cool or relax for the period your spec names before anyone judges it. Plastisol looks glossy and flexible at 140 F and turns matte and brittle at room temperature. Judging warm hides the defect you are trying to catch.
Keep the approved first-off in a bag away from light, or hold a controlled photo plus a measurement sheet when the garment cannot be stored. A monitor image will not show scale, opacity, texture or hand.
Inspect appearance and placement
View the whole garment at arm's length first, then the details under fixed light. Check orientation, location, dimensions, and graphic completeness. Check color sequence, opacity, coverage, and edges. Check fine lines, small type, registration, and stray ink. Check scorch, shine, staining, lint, and fabric damage.
Record placement as a number between named points, for example the top of the graphic to the bottom of the collar seam. On multicolor work, inspect the tightest registration crossing, not the overall impression.
Visual color calls need controlled light, a neutral surround and a stable reference. AATCC describes its Gray Scale for Color Change as a tool for visually evaluating textile color change under Evaluation Procedure 1. That page supports the purpose of the scale, not a grade for an untested print.
Check hand, dimensions and structure
Hand is how the print feels: stiff, thick, tacky, rough, how it drapes. Name who assesses it, how the sample is conditioned and which reference it is compared against. A heavy white underbase and a DTF film can both pass a wash test and feel nothing alike.
Measure these with the same tape and points:
- garment length
- width
- sleeve
- pocket
- seam position
- graphic dimensions and distortion
- before and after heat or care Report overall shrinkage apart from skew, twist, seam puckering and local distortion around the print.
Prove cure and process settings
For cured ink, log the dryer and the set point. Record how temperature was measured and the dwell time. Also log the belt speed and pressure. Record the evidence the ink maker requires. A controller display is not proof that the ink film reached temperature. Thick white deposits and thin halftones sit in the same oven and behave differently.
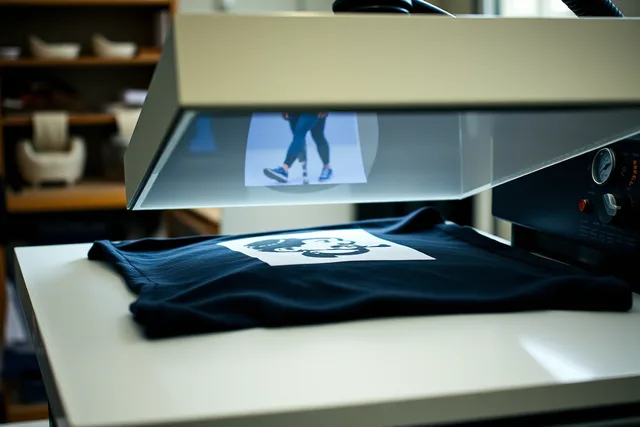
For transfers, check several factors. These include edge bond, full contact, carrier removal and pressure distribution. Also check garment geometry and the cold peel condition. For embroidery, check relaxed shape, thread condition, backing, needle holes and puckering. Use the supplier's current technical sheet for that exact system, then qualify the finished build.
Run one durability check per failure mode
Stretch finds splits, edge lifting, thin coverage and poor recovery. It does not predict wash results. Crocking finds color transfer and surface loss. It is not an adhesion test. A hand peel finds an obviously lifted transfer, but an improvised pull is not a standard result and cannot be reported as one.
Laundering combines several factors:
- water
- chemistry
- mechanical action
- temperature
- load
- drying
- repeated conditioning Record every one of those conditions. Compare like specimens after the same wait. Then inspect these traits:
- color
- cracks
- peeling
- edge lift
- abrasion
- tack
- bleeding
- staining
- garment dimensions
- seam movement
- graphic distortion
What it finds
- Cold peel or scratch
- Obvious transfer lift, weak edge bond
- Stretch and recovery
- Cracks, splits, poor coverage
- Crocking
- Color transfer, surface loss
- Laundering sequence
- Cracks, bleeding, shrinkage, edge lift
What it cannot tell you
- Cold peel or scratch
- Wash durability
- Stretch and recovery
- Color fastness
- Crocking
- Adhesion strength
- Laundering sequence
- Long-term wear beyond the cycles run
Decide, record, release
Grade each stated limit pass, fail or hold. Never average a critical defect away. Set the sampling plan, the escalation rule, the stop point, the reinspection scope and who may approve a deviation before the run starts.
The release record ties product and lot to a set of items:
- artwork
- materials
- equipment
- settings
- first-off
- test specimens
- raw observations
- photos
- results
- nonconformities
- corrections
- final quantity
- rejected quantity
- date and approver Keep failed evidence until the investigation closes.
Common questions
Is a good-looking first-off enough to approve production?
No. It also has to pass the cold, dimensional, adhesion, stretch, crocking and laundering checks your spec names for that product. Appearance is one result, not the whole approval.
Does one wash cycle prove long-term durability?
No. One defined cycle gives one result under one set of conditions. The sequence you run has to match the claim you are making and the method you qualified.
Can every decoration use the same limits?
No. Plastisol, water-based ink, DTF transfers, DTG, embroidery and patches fail in different ways. Each build needs its own limits and its own test set.
What should be kept after release?
Keep the approved spec. Keep the retained sample or controlled record. Keep material and lot identities. Keep machine settings. Keep raw results. Keep exceptions. Keep quantities. Keep the approval history.