Guides
Apparel screen-printing guide: mesh, stencil, ink, squeegee, registration, cure, and inspection
Mesh, stencil, ink, squeegee, registration and cure decisions that hold a screen-printed garment together from artwork to final quality inspection.
What to take away
- Mesh count means nothing without thread diameter, tension and open area; record all four.
- A screen that passes inspection off press can still fail on press if off-contact and platen support are wrong.
- Flash gels a layer so the next screen releases clean; it never substitutes for final cure.
- Registration drifts when heat, loading and stroke force change the garment, not the screen.
- Test the worst deposit on the print, because thick and thin areas cure at different rates.
- Keep the batch, the mix by mass and the cure reading with the sample, or a failure cannot be traced.
Screen printing pushes ink through the open areas of a stencil held on tensioned mesh. Every step depends on the one before it. A perfect stencil cannot save weak artwork, a registered press cannot hold a garment that shifts, and a dryer display cannot prove the ink film reached temperature.
Read the artwork before it reaches a screen
Measure the smallest positive line, the smallest negative gap, the smallest dot and the smallest highlight opening in the actual separation. Those four numbers decide mesh, stencil and squeegee before anyone coats a screen.
Artwork Preflight Checklist
- Measure smallest positive line
- Measure smallest negative gap
- Measure smallest dot
- Measure smallest highlight opening
- Confirm dimensions and garment color
- Confirm underbase, traps, print order
- Write acceptance criteria
Confirm finished dimensions, garment color, placement, and spot colors. Also confirm underbase, traps, and print order. Write acceptance criteria for placement, opacity, registration, hand, surface damage and cure evidence.
When the process is new, print a test target beside the customer art. A target on the same garment, same ink and same press proves the setup; a target on a different blank proves nothing.
Match mesh and stencil to deposit and detail
Record frame identity, mesh type, mesh count with its measurement system, thread diameter, tension and print history. Higher count generally means more threads and smaller openings, but count alone does not give open area, deposit or resolution.
Pick emulsion chemistry that suits the ink, the cleaning method and the exposure unit. Here are the factors to consider:
- Control coating
- dry conditions
- film contact
- exposure
- washout
- blockout
- any post-treatment. Inspect for pinholes, scum, weak edges and blocked detail before the screen goes to press.
Rochester Institute of Technology's screen-printing procedure defines mesh value, squeegee, stencil transfer and the momentary screen-to-substrate contact made by a print stroke. Its screen-printing operating procedure also covers controlled setup, documentation and cleanup. It is a school document, so use its process model and follow your own equipment, ink and chemical instructions.
Prepare the press and the garment support
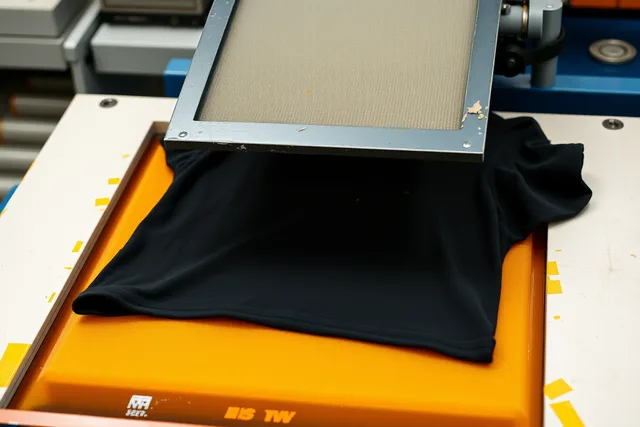
Level and secure the press to its manual. Check platen size and flatness. Check parallel relationship and holding method. Check clearance from seams, collars, pockets, and zippers. Check clearance from hardware. Clean anything that could transfer onto a garment.
Set off-contact or peel so the screen releases cleanly without excessive deflection. Record screen position and micro-registration values if the press reports them. Load a representative garment and let it relax before alignment.
Heat moves the whole system. A flash can warm or shrink a garment, soften adhesive and change platen conditions. Check registration after the sequence has reached a stable working state, not before.
Control the squeegee and the stroke
Record these blade details: material, durometer, profile, and edge condition. Also record width, angle, pressure, speed, and stroke count. Replace or sharpen damaged edges by the approved method; a nick prints a repeating streak.
Flood and print do different jobs. The flood fills open stencil areas without making the production deposit. The print stroke brings the screen into controlled contact and transfers ink.
Excess pressure bends the blade, spreads ink, distorts the screen and drives the image out of register. Too little leaves weak coverage. "Pull harder" is not a transferable instruction; a number is.
Select and manage ink
Verify product name, batch, color mix, and substrate compatibility.
Verify stencil compatibility, storage, and pot life. Record every addition by mass. Do not return contaminated mixed ink to clean stock.
Watch for viscosity change, skinning, settling, foam and drying in the mesh. Keep containers closed between uses and follow the safety data sheet and your facility controls. For ventilation and chemical handling questions, follow OSHA and the ink maker's instructions rather than a shop habit.
Register multiple colors
Use the same marks and artwork origin on every separation. Set the garment position first, then register screens to a stable test substrate or a qualified setup method. Check image edges, traps, underbase choke, fine crossings and distant marks.
Print progressive tests in production order. Two marks can align while the image distorts elsewhere, so inspect the whole graphic. Approve a first-off garment only after flash and cure conditions match the intended run.
Flash only as much as the sequence needs
Flash gels, dries or stabilizes a printed layer before the next screen. The required condition depends on the ink system. Record time, distance, any energy or temperature reading, garment surface response, and cooling between stations.
Overflashing changes adhesion, hand, garment color, shrinkage and later registration. Underflashing causes pickup, smearing and color contamination. Confirm the next screen releases cleanly, and never treat a flash as final cure.
Cure or fix the complete ink film
Follow the current ink manufacturer's instructions for the exact product, additives, deposit, garment and equipment. Measure the ink film condition with the specified tool and method. Air temperature, dryer setpoint, belt speed, surface reading and film temperature are not interchangeable.
Test the cold print through the required stretch, adhesion, wash or abrasion procedure. Keep the readings and the sample identity together. If a thick area and a thin area differ, test the worst credible deposit.
| Check | What it catches | Where the number comes from |
|---|---|---|
| Film temperature at exit | Undercure, scorching | Ink maker's spec, measured with a probe or strips |
| Wash test after cure | Adhesion loss, cracking, peeling | AATCC wash methods, or the ink maker's stated cycle |
| Crock test | Crocking, dye transfer | ASTM crock method, dry and wet |
| Stretch test | Cracking over seams and ribs | Ink maker's elongation figure |
| Registration check after flash | Drift from heat and shrinkage | Your own first-off against the approved proof |
Inspect, control and release
Approve the first conforming garment, then inspect at a risk-based interval. Check the following print attributes:
- identity
- placement
- color
- opacity
- registration
- detail
- fibrillation
- contamination
- pinholes
- ink pickup
- hand
- scorching
- cure evidence
- dimensions
Stop when results leave the accepted range. Quarantine back to the last known good check and keep the failed units and settings before adjusting anything. At closeout, reconcile these items:
- garments
- ink
- screens
- test samples
- rework
- rejects
- released quantity
Common questions
Does a higher mesh count always produce more detail?
No. Count interacts with thread diameter, open area, tension, stencil and ink.
Count also interacts with artwork, exposure, squeegee and substrate. Test the complete screen rather than trusting the number.
Is flash temperature the same as cure temperature?
Not necessarily. Flash and final cure have different purposes and different targets. Follow the exact ink system's instructions and verify the finished film, not the dryer display.
Why does registration change after setup?
Garments, screens, platens, adhesive, press parts and ink respond to heat. They also respond to loading, stroke force and time. Recheck under stable production conditions instead of chasing the screen.
What belongs in the job record?
Artwork and separations, screen data, inks and mixes by mass. Press setup, garment batch, stroke controls, flash and cure evidence. Inspections, tests, deviations, quantities and release.
In this guide
- How to set up and document a two-color textile screen printA two-color screen print holds its registration only when the separations, screens, ink mixes, stroke settings and cure records are frozen before the first pull.
- Textile screen-printing inks compared: water-based, plastisol, discharge and specialtyTextile screen-printing inks compared across film, hand, opacity, garment limits, stencil, mesh, flashing, cure, testing, cleanup, safety, waste, and records.
- Textile screen-printing checklist: screen, stencil, ink, registration, cure and cleanupTextile screen-printing checklist for artwork, screens, stencils, inks, press setup, garments, registration, strokes, flash, cure, inspection, cleanup, and release.
- Textile screen-printing problems: pinholes, fibrillation, poor opacity and undercureTextile screen-printing problems guide for diagnosing pinholes, fibrillation, ink pickup, weak opacity, registration error, undercure, contamination, and drift.
- Correcting registration drift in a three-color shirt run caseA three-color run drifts at garment 37 because the platen lost its hold, not because the screens moved. Here is how the shop found it and restarted.