Guides
Part of Apparel heat-transfer guide: film, adhesive, cutting, weeding, placement, pressing, and testing
How to apply and verify a heat-transfer graphic on a garment
How to apply a heat-transfer graphic and verify it covers cut settings, weeding, placement, press time, peel temperature, and wash tests that decide release.
What to take away
- Cut, weed and press a sample on the darkest, most textured and most heat-sensitive garment in the order before running the full quantity.
- Weed the test cut before you cut the production file. A carrier that tears at the corner will tear on every repeat.
- Load only the decorated panel on the platen. Collar, zipper, pocket and drawcord move off the contact zone.
- Record press, platen, pad, indicated temperature, pressure method, dwell, peel and operator on the job sheet.
- Release production only after the decorated sample passes the care test written on the transfer instructions.
This method covers cut heat-transfer film with a carrier. Flock, foil, puff and reflective films are built differently, and printable, screen-printed and sublimation transfers differ again. The current instructions for the exact product override anything here.
Freeze the job specification
Write the job code, artwork revision, finished dimensions, orientation and location on the traveler. Add garment supplier, style, color, and size, then batch.
Transfer manufacturer, product, color, and batch, then storage status. Name the approver.
Acceptance criteria are defined for these quality checks:
- placement
- dimensions
- missing elements
- edge
- color
- hand
- fabric damage
- adhesion
- stretch
- laundering State which substitutions force a new sample. A color change on the same style is usually a new sample. A new garment batch is always one.
Confirm material compatibility
Read the current technical sheet and safety information for the transfer. Confirm the product covers the garment fiber and its finish.
Check whether either supplier warns about nylon, coatings, sublimated polyester, or stretch.
Also check for waterproofing, dye migration, heat sensitivity, or layering. Sublimated polyester is the common failure: dye moves into the adhesive during the press and reappears days later as a color shift at the edges.
Inspect the garment for these issues:
Garment Pre-Press Inspection
- Moisture present
- Contamination on surface
- Lint on fabric
- Seams in contact zone
- Zippers in contact zone
- Pockets in contact zone
- Labels and drawcords
- Thick joins
Prepare the cut file
Set final dimensions and convert approved artwork into clean closed paths. Remove duplicates and hidden objects. Join shapes that should stay whole.
Inspect these features for defects:
- counters
- punctuation
- dots
- narrow lines
- gaps
- acute corners
- small islands Mirror the design only when the product path requires it, and put a readable orientation note outside the image. Keep the production file and cutter output settings under revision control.
Load and test the cutter
Confirm carrier and adhesive sides before loading. Align the roll so the pinch rollers track over supported areas. Inspect blade extension, blade tip, holder, carriage and cutting strip against the cutter manual.
Run a small test containing a corner, a circle, a narrow line, a small counter and an open field. The Siser heat-transfer vinyl cutter settings chart gives material-specific starting settings for named cutters and Siser products.
The chart supports testing by material and machine instead of copying one force value. It does not replace the current cutter manual, and it does not qualify another brand.
Weed the test. The transferable layer should separate cleanly while the carrier stays serviceable. Inspect both sides under good light, adjust one setting at a time, and rerun the same shape.
Cut, weed and verify the graphic
Run the final file at the approved settings. Keep the roll supported so loose material cannot strike the carriage or reach the floor. Label the cut with job and material identity before it can be mixed with another order.
Weed on a clean surface with the authorized tools and direction. Do not stretch the carrier. Compare the result element by element with the approved proof: every counter open, every small island present, no cut bridge or carrier tear crossing the design.
Measure finished graphic dimensions on the carrier. If the product permits stacking, confirm layer order, exposed adhesive, overlap rules, carrier removal sequence and cumulative heat before continuing.
Prepare the press and garment
Complete the press startup and safety inspection. Guards, handle or air controls, emergency features, and platen surface are checked under current procedures. Pad and electrical condition are also checked. The measuring device and pressure-control method are in service.
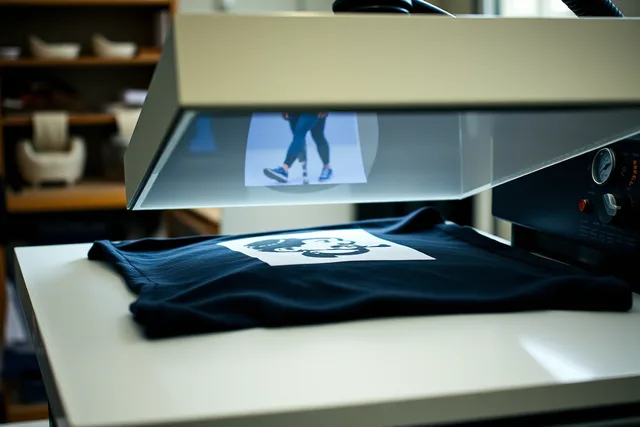
Load the garment so only the decorated panel lies on the active platen. Move seams, collar, pocket, zipper, drawcord and hood out of the contact zone. Use a qualified platen or support when the geometry requires it. Smooth the fabric without stretching it.
Run a recorded heat-response test. If the process calls for a prepress, use only its defined time and purpose, then let the area return to the specified condition before placing the graphic.
Position the transfer
Establish the approved datum. Measure the graphic itself rather than the visible carrier edge, which may be uneven.
Check center, height, rotation, clearance from seams and size-specific placement. Secure the transfer only with a method compatible with the carrier, garment and heat. Recheck orientation, especially mirrored lettering. Photograph the first-off when placement risk is high.
Press and peel
Set the temperature, pressure and time from the current transfer instructions and the qualified trial. Record the press, platen, pad, and cover sheet. Record the indicated setting, verification method, dwell, and operator.
Close the press without shifting the garment. Do not interrupt the dwell to inspect. Open under the safe operating procedure, then peel hot, warm or cold exactly as specified, at the approved angle and speed, without stretching the fabric.
Complete any second press with the specified cover and settings. If an edge lifts or adhesive spreads, retain the sample and investigate. An unrecorded extra press changes the process and is not normal finishing.
Inspect the cold result
Let the garment cool flat. Confirm identity, placement, dimensions, orientation, and complete elements. Check edge contact, surface, hand, and color. Check gloss, carrier line, adhesive residue, and scorch. Check shine, dye movement, texture, and garment dimensions.
Flex or stretch only under the approved test. An informal pull test proves nothing about service life. Mark the sample code and keep the full process record.
Test care and release production
Hold the decorated garment for any specified interval before care testing. Wash and dry it under the written method alongside an unwashed control.
Record the following:
Care Test Record
- Detergent used
- Water type
- Cycle setting
- Load size
- Temperature
- Drying method
- Specimen orientation
- Observations
Inspect these features:
- lifting
- cracking
- edge change
- color
- staining
- migration
- hand
- surface
- garment dimensions Release production only when the required samples pass. During the run, inspect at defined intervals and after every change or stoppage.
Worked example: a 24-piece order that failed at the edge
A shop pressed 24 black polyester tees with a two-color cut film at the settings from a previous cotton job. The first-off looked correct. Three days later the edges of the white layer had picked up a pink cast and the corners lifted after one wash.
Failure Cause and Fix
- Cotton dwell setting used on polyester
- Adhesive never fully flowed
- Sublimation dye moved into adhesive
- Pink cast and lifted corners
- Lower temperature held longer
- Barrier layer under film
- Wash test before remaining 23
The cause was two faults stacked. The dwell was set for cotton, so the adhesive never fully flowed into the polyester, and the polyester was sublimation-dyed, so dye moved into the partly bonded adhesive.
The fix was a lower temperature held longer, a barrier layer under the film, and a wash test on one garment before the remaining 23 were pressed. The shop also added a line to the traveler: garment fiber and dye method, recorded before the press is set.
Common questions
Can a household iron replace a heat press?
Only if the transfer manufacturer supports it and the qualified method can control coverage, heat, pressure, time and repeatability for the job. Most cut films need pressure a hand iron cannot hold across a full panel.
Why did a tiny detail disappear during weeding?
Likely causes include unsuitable artwork, an incomplete cut, excessive force, or a worn blade. Other causes are a worn cutting strip, the wrong material side, poor carrier hold, or rough weeding. Change one variable, then rerun the same test shape.
Should a lifted edge receive more heat?
Not automatically. A list of things to keep before choosing a correction:
- sample
- check material
- garment
- contact
- heat
- pressure
- time
- peel More heat on a sublimated garment usually makes the edge worse.
What belongs in the approval record?
Steps in the garment decoration workflow:
- File
- transfer
- garment
- cutter
- cut settings
- press
- application controls
- inspection
- care test
- sample code
- date
- operator and approver. The record is what lets you requalify the job when any one of them changes.