Guides
Part of Apparel screen-printing guide: mesh, stencil, ink, squeegee, registration, cure, and inspection
How to set up and document a two-color textile screen print
A two-color screen print holds its registration only when the separations, screens, ink mixes, stroke settings and cure records are frozen before the first pull.
What to take away
- Freeze the two approved separations, the print order and the garment before anyone touches a screen.
- Give every screen, ink mix, test garment and press setting its own code, so a failure points at one variable.
- Register on the real garment at running heat, not on a flat sheet at room temperature.
- Treat flood, print stroke, flash and final cure as four separate operations with four separate records.
- Approve a cold first-off, then quarantine back to the last passing check the moment anything drifts.
This method assumes trained operators, working ventilation and current equipment instructions. It organizes a two-color job without prescribing mesh, exposure, pressure, time or temperature, because those come from your ink supplier and your own trials.
Release the job inputs
Confirm the job code, garment supplier style, color, sizes and batch. Confirm print location, finished dimensions, placement datum, the two color targets and the print order. Confirm the underbase decision, quantity, tolerance and named approver.
Release the job inputs
- Job code, garment supplier style, color, sizes, batch
- Print location, finished dimensions, placement datum
- Two color targets and print order
- Underbase decision, quantity, tolerance, named approver
- Two named separations on common registration marks
- Smallest positive and negative features measured
- Overprint, trap, choke or knockout noted
The artwork package should carry two clearly named separations on common registration marks. Inspect each alone, then together. Measure the smallest positive and negative features. Note whether either color overprints, traps, chokes or knocks out the other.
Identify screens and stencils
Assign one screen code per color. Record frame, mesh specification and unit, tension reading, stencil system, coating and exposure record. Add image orientation and inspection result.
Hold a screen for pinholes, blocked detail, weak emulsion, or damaged mesh.
Also check for poor edge definition, scum, or missing marks. Repair only by a documented method that leaves approved image areas untouched.
Prepare the press and platen
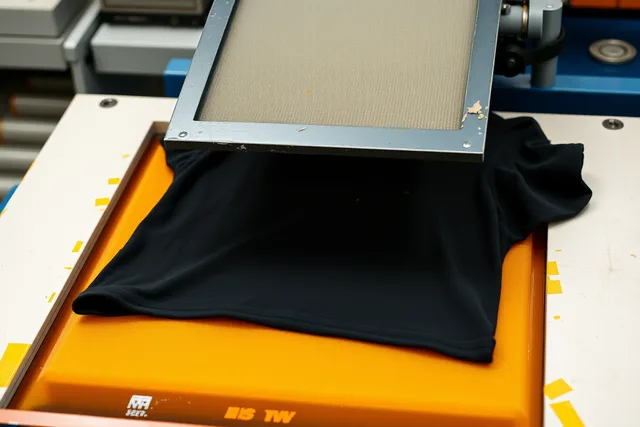
Inspect guards, controls, clamps, and platens. Also inspect flash, dryer, and measuring devices. Follow current procedures. Clean the platen and confirm its support matches the garment and print area. Isolate collars, seams, pockets, zippers and doubled layers.
Set the garment holding method so adhesive stays inside the controlled area. Load several blanks and check centerline, knit direction and natural skew. Define one repeatable loading reference and write it down.
The School of Visual Arts Printshop describes screen printing as stencil and mesh transfer using a flood and squeegee stroke, with one screen per color.
Its silkscreen process overview says color layers must align in the same place and print in a controlled order. That page covers an art-print setting, so a garment job adds platen, heat, cure and textile checks on top.
Establish dry registration
Mount both screens and center their images over the loaded garment reference. Align the common marks on a stable test sheet or another qualified setup material. Record screen positions or micro-registration values.
Check distant points in the image, not one mark pair. A screen can rotate or distort while a central mark still looks close. Inspect every trap and every edge where one color meets the other.
Prepare the inks
Verify the exact product, batch, substrate compatibility and stencil compatibility. Check the safety data, storage status and the cure or fixation instructions.
Mix each color against its approved physical target under controlled light. Record component masses, additives, mix time, operator and final batch code. Keep enough ink for setup, production, tests and a retained sample, and do not reformulate midrun.
Make first pulls on test material
Set off-contact or peel, squeegee blade, angle, pressure, speed and strokes through controlled trials. Print each color alone to confirm stencil opening, coverage and edge. Then print both in order on a production-representative garment.
First pulls on test material
- Set off-contact or peel, squeegee blade, angle, pressure, speed, strokes
- Print each color alone to confirm stencil opening, coverage, edge
- Print both colors in order on production-representative garment
- Write first settings down before changing them
- If a result fails, name one suspected variable and issue new trial code
Write the first settings down before you change them. If a result fails, name one suspected variable and issue a new trial code. Changing screen position, stroke, flash and ink at once teaches you nothing.
Set the flash condition
If color one needs stabilization, flash only to the condition color two requires. Record equipment, distance or position, time, readings and cooling behavior. Inspect for pickup on the second screen, garment movement, gloss, scorching, tack and ink contamination.
Run several cycles before you approve final registration. Heat changes platen adhesive, garment dimensions and press conditions. Recheck both marks and the image edges once the press is at its stable state.
Print and cure the first-off garment
Print a coded first-off garment using the intended loading, strokes, order, flash and dryer path. Record the actual conditions and anything the operator noticed. Let it cool before judging hand, gloss, color or stretch.
Area / Acceptance question
- Identity
- Correct garment, color, size, batch, artwork revision
- Placement
- Datum, dimensions, orientation, tolerance
- Color
- Physical references under stated light
- Registration
- All image edges, traps, fine crossings
- Deposit
- Opacity, surface, hand, fibrillation, pinholes
- Garment
- Scorch, shine, distortion, contamination
- Cure
- Required measurements and finished-film tests
Complete the specified stretch, adhesion or wash tests, following the ink maker's method and any AATCC or ASTM procedure the buyer names. Approve only when the cold finished sample passes.
Control the run
Keep the approved first-off at the press. At the defined interval, check garment loading, color, registration, and deposit. Also check pickup, surface condition, and cure evidence. Log sample codes and results.
Watch for ink viscosity change, drying in the mesh, screen movement and platen contamination. Watch for adhesive loss, heat buildup, a garment batch change and squeegee wear. Stop at the first unapproved condition and quarantine back to the last passing check.
Close and release
Reconcile these quantities:
- received
- printed
- accepted
- reworked
- rejected
- tested
- retained
- unprinted Return or dispose of ink and cleaning materials under the product and facility rules. Clean and inspect screens, squeegees, platens and equipment.
The traveler closes with a series of items:
- separations
- screens
- ink mixes
- press positions
- stroke settings
- flash and cure evidence
- first-off approval
- in-process checks
- test results
- deviations
- quantities
- packing
- a named release
Common questions
Which color should print first?
The order is set by artwork, garment, opacity, and traps. Ink behavior, flash needs, and desired appearance also set the order. Test it and record it. Never assume the darker ink goes first.
Should registration be approved before ink is added?
Dry alignment is one stage, not the approval. Approve printed registration once the real garment, the strokes, the flash and stable operating heat are all present.
Can the same squeegee settings serve both colors?
Only if trials support it. Different deposits, stencils, inks and image areas often need different controlled settings. Record each color separately.
What should stop the run?
Wrong garment or file. Screen movement. Lost detail. Color drift. Registration outside tolerance. Pickup. Contamination. Abnormal heat. Failed cure evidence. A missing record.