Guides
Apparel heat-transfer guide: film, adhesive, cutting, weeding, placement, pressing, and testing
A heat transfer is a material system: film, adhesive, artwork, cutting, weeding, placement, pressing and testing all decide whether it survives the wash.
What to take away
- A heat transfer is a material system, not one film with one universal press recipe.
- Match the transfer to fiber, finish, color, stretch, texture, care and heat limit.
- Artwork has to survive cutting, weeding, printing, masking and transfer.
- Time, temperature, pressure, contact and peel condition work as one set.
- Inspect the cold garment and pass the care test before you approve production.
Heat-applied graphics run from single-color cut film to printed and screen-printed transfers. All of them use heat and pressure somewhere, but their carriers, color layers, adhesives and garment limits differ.
Understand the transfer build
A cut film carries a color or effect layer, a heat-activated adhesive and a carrier. The cutter scores the transferable layers and leaves the carrier intact. The operator weeds, positions the carrier, presses, then peels under the product's own condition.
Transfer Types Compared
Cut film
- Build
- color layer, adhesive, carrier
- Bonding
- heat-activated adhesive
- Extra part
- carrier
- Mirroring
- sometimes reversed
Printable
- Build
- ink layer, mask
- Bonding
- adhesive film
- Extra part
- application mask
- Mirroring
- varies by process
Screen-printed
- Build
- printed deposits, adhesive
- Bonding
- adhesive layer
- Extra part
- release media
- Mirroring
- varies by process
Sublimation
- Build
- disperse dye on paper
- Bonding
- dye into polymer
- Extra part
- polymer surface
- Mirroring
- not applicable
A printable transfer adds an ink-receptive layer and often a separate application mask. A screen-printed transfer is built from one or more printed deposits on release media, usually with an adhesive layer. Sublimation paper carries disperse dye that moves into a polymer-bearing surface instead of bonding through an adhesive film.
Know which side is cut or printed, whether the image is mirrored, which carrier or mask belongs with it, how it stores, and whether it layers. Do not pair film, mask, ink, adhesive or release media just because the dimensions fit.
Match material to the garment
Record supplier style, color, size range, batch, and fiber label.
Garment Compatibility Checks
- Record supplier style, color, size, batch, fiber
- Record knit or weave, surface, finish, seams, care
- Read transfer maker's current compatibility statement
- Run hidden-area heat test where allowed
- Press full decorated sample
- Record scorching, shine, shrinkage, color, texture, dimensions
Dark polyester can push dye into a heated decoration. Stretch pulls a rigid film apart or distorts its edge. A water-repellent finish weakens adhesion. Fleece texture and lint cut contact. Raised seams, pockets, zippers, drawcords and hoods keep platens from meeting evenly.
Run a hidden-area heat test where the garment allows it, then a full decorated sample. Record scorching, shine, shrinkage, color movement, texture change and dimensions after the piece cools.
Prepare artwork for the route
For cut film, close the shapes and remove duplicate paths. Join intended areas and set a minimum line, gap, island and corner. The qualified cutter and material can hold that. Reverse the image when the process cuts from the adhesive side through a clear carrier. Keep an orientation mark outside the artwork.
Artwork Prep by Route
- Cut filmclose shapes, remove duplicate paths
- Cut filmset minimum line, gap, island, corner
- Cut filmreverse image if cutting adhesive side
- Printablecontrol dimensions, pixels, color mode, profile
- Printableset bleed, contour, offset, registration
- Screen-printeddocument separations, mesh, ink, adhesive
- Screen-printedrecord release sheet, gel, cure, storage
For printable material, control these items:
- image dimensions
- pixel data
- color mode
- profile
- bleed
- contour path
- cut offset
- registration marks
- ink drying or outgassing
For screen-printed transfers, document these details:
- Separations
- Print order
- Mesh
- Ink
- Adhesive deposit
- Release sheet
- Gel or cure condition
- Storage
Siser's current heat-transfer vinyl application chart lists directions for its named products. These directions cover cut, weed, substrate, and temperature. They also cover pressure, time, peel, layer, and wash. The chart supports treating those controls as material-specific. It does not supply settings for another manufacturer or prove a listed fabric will pass on every finished garment.
Cut and weed without hidden damage
Confirm material identity, batch, width, side and roll direction. Load it squarely. Inspect the blade, holder, pinch rollers, cutting strip and path. Run a small test cut with the exact film and carrier, then adjust under the cutter and material instructions.
The target is a complete cut through the transferable layers without deep carrier scoring. Excess force damages the carrier, lifts corners, distorts fine shapes and shortens blade or strip life. Too little force leaves bridges that tear during weeding.
Weed under stable light with a controlled tool. Check counters, dots, punctuation, narrow bridges and small islands against the approved proof. Save or photograph a weeded first-off when a missing element would be expensive.
Mask and stage printed transfers
Use the mask specified for the printed film. Let ink dry, cure or outgas as its instructions require before masking. Apply the mask without bubbles, wrinkles, debris or stretch. Confirm the graphic releases from its liner and holds its dimensions.
Store prepared transfers flat or as directed, with identity, batch, artwork revision, date and use window. Keep face-to-face surfaces apart if blocking or ink transfer is possible. A transfer prepared correctly today can still fail if heat, humidity, stacking, contamination or age moves it outside its approved condition.
Control placement and the press
Build a datum operators can repeat across sizes. A center fold is not automatically stable if the garment is skewed. Use seams, collar, panel edges, platen features, templates or measured coordinates as the method allows.
Thread or isolate the garment so seams and hardware sit off the active press area. Add a platen or pad only when the qualified method calls for it. Prepress solely for a defined purpose such as flattening or managing moisture, because added heat can also mark or shrink a garment.
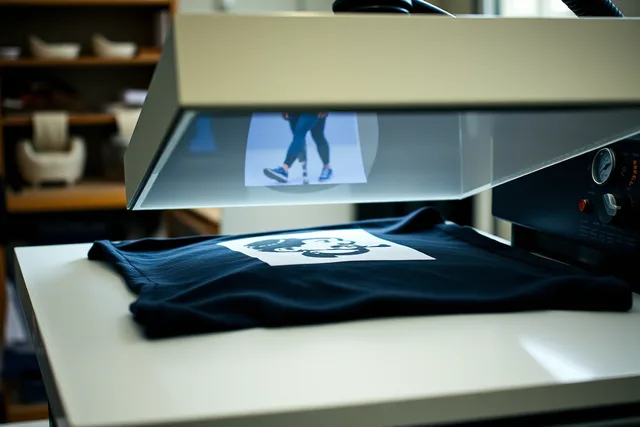
Record the press, platen, pad and cover sheet. Note the indicated setting, measured condition, pressure method and dwell. Add loading, transfer position, peel condition and any finishing press. Verify contact across the whole graphic. The displayed temperature and a closed handle are not proof of what happens at the material interface.
Inspect, test, and release
Follow the specified hot, warm or cold peel. If a corner lifts, stop and preserve the evidence instead of rubbing it down without a record.
Before judging the garment, let it cool flat and check:
Inspect and Release
- Follow specified hot, warm or cold peel
- If corner lifts, stop and preserve evidence
- Let garment cool flat before judging
- Check color, edge, hand, shine, carrier marks
- Check adhesive residue, scorch, distortion, dimensions
- Run flex, stretch, adhesion, abrasion, wash, dry tests
- Inspect at written interval and after every stoppage
- Quarantine suspect output to last passing check
Tests run against an unwashed control:
- dimensional tests
Approval belongs to the named artwork, transfer batch, garment and lot.
Approval also belongs to the press, platen, settings, operator method and care result.
Inspect at a written interval during production, and after every stoppage, adjustment, material splice, press change or failure. Quarantine suspect output back to the last passing check. Reconcile accepted, tested, reworked, rejected and unused goods at closeout.
A worked release sequence
Use this order on a new transfer and garment combination. Substitute your own figures for the variables.
- Confirm the transfer maker's current compatibility statement for the exact garment, fiber and finish.
- Run a hidden-area heat test where the garment allows it, then a full decorated sample.
- Press the sample at the specified temperature, pressure and dwell, with contact verified across the graphic.
- Peel at the specified condition, then let the garment cool flat.
- Wash and dry the sample per the care label, with an unwashed control beside it.
- Compare edge, hand, shine, color and dimensions, then release or revise the written setup.
If the sample fails, change one variable at a time and keep the failed piece. A stack of labeled failures is what tells you which control was wrong.
Common questions
Is every cuttable vinyl suitable for clothing?
No. Sign vinyl and heat-transfer film are built differently and meant for different jobs. Use a product explicitly supported for the named garment and process.
Does more pressure always improve adhesion?
No. Excess pressure marks fabric, spreads adhesive, distorts texture or damages a transfer. Use the specified range and verify contact rather than leaning on the handle.
Can several HTV products share one press setting?
Only when current instructions and your own qualification support that exact combination. Product families can call for different heat, time, pressure and peel conditions.
When is a heat transfer approved?
After the cold finished garment passes identity, appearance, placement, physical, care and record requirements under the named configuration.
In this guide
- How to apply and verify a heat-transfer graphic on a garmentHow to apply a heat-transfer graphic and verify it covers cut settings, weeding, placement, press time, peel temperature, and wash tests that decide release.
- Heat-transfer vinyl, printable transfer, screen-printed transfer, and sublimation comparedApparel heat-transfer methods compared across image, film, adhesive, carrier, garment, cutting, printing, color, hand, heat, quantity, care, testing, and records.
- Heat-transfer production checklist: film, garment, press settings, peel and washHeat-transfer production checklist for cutter, film, carrier, garment, placement, press, pressure, temperature, time, peel, inspection, wash tests, and release.
- Heat-transfer problems: lifting edges, scorch marks, carrier lines and residueLifting edges, scorch marks, carrier lines and residue trace back to film, adhesive, heat, pressure, peel and care, and each cause has its own fix.
- Repairing inconsistent adhesion across a hoodie transfer run caseA hoodie heat-transfer run failed at one graphic corner, and the fix came from pad condition and garment loading, not from adding more press time.